Subhra's Online Blog
Tattvabodhika
Tattvabodhika



Where the mind is without fear..
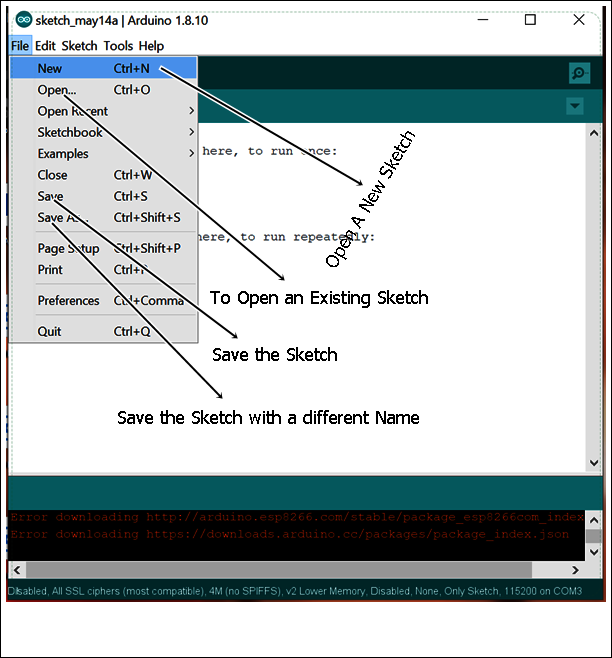
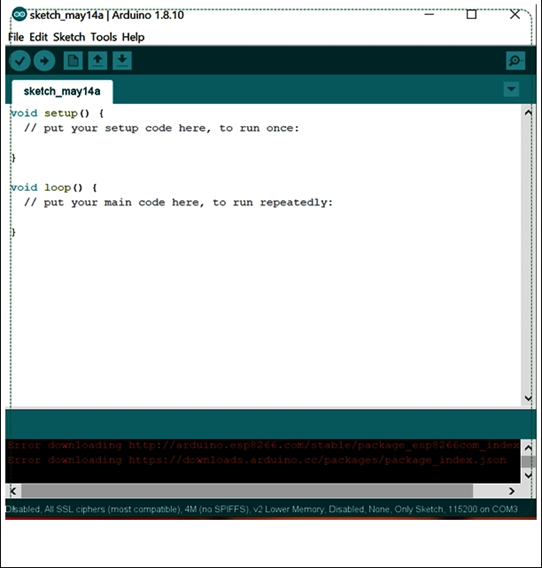 Now, to understand the File menu, to open an existing .ino file and its saving options, look at the following figure. It is worthy to mention that Arduino working code are saved with .ino extensions. In the following sections we will discuss about that.
Arduino Sketch with File menu options:
//Arduino IDE File
 1 Setup Arduino IDE for Arduino
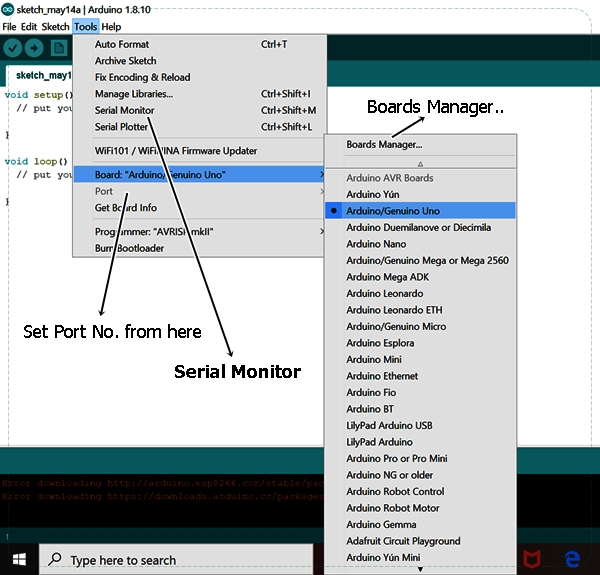
To setup Arduino for a Arduino UNO board, we have to go to ToolsBoardsArduino UNO
Follow the following figure:
//Arduino IDE Tools
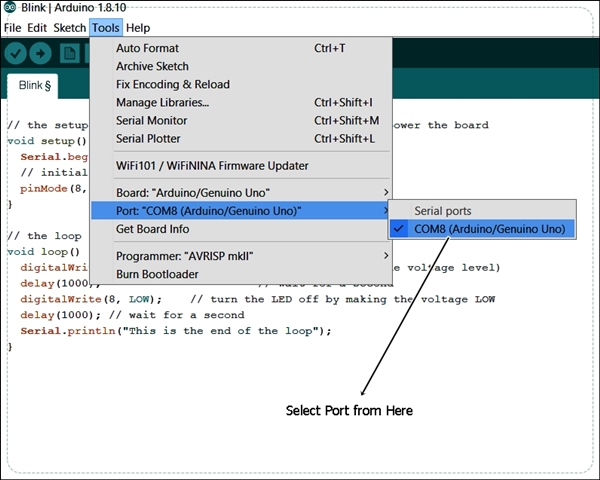
 After choosing the right board for the Arduino we have to set the port no. Usually this menu is disabled. This Port is enabled once the Arduino board is connected to the Personal Computer through the USB cable. See the figure below:
//Arduino IDE Port
 2 Installing new Boards in Arduino IDE
If we found any board which is connected to PC (Personal Computer) and recognized by it and not listed in Tool>Boards>[drop down Menu], we have to select Tools>Boards Manager.. .
A new window will open. If the Computer is connected to internet, it will download all available downloaded & downloadable boards info into that window.
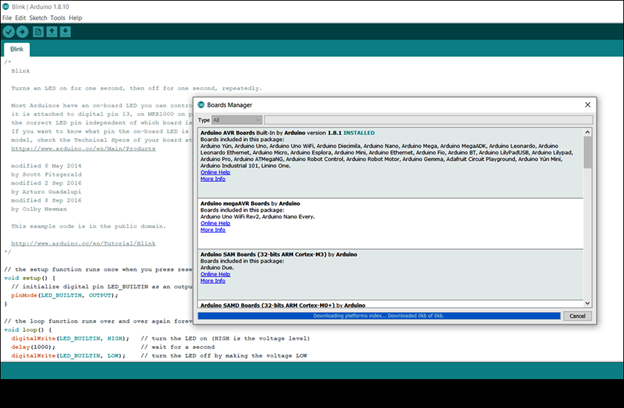 We can make a search to get our desired board. Once we will get the desired board, we can download and install the board following ‘Install’ link provided with boards info.
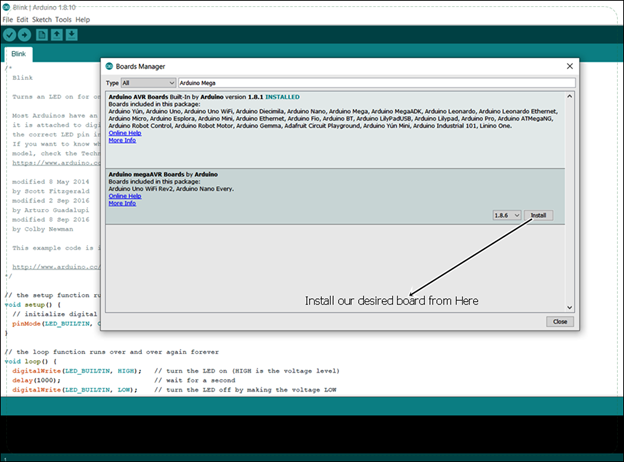 After download is Completed, the board will appear in Tools>Boards>[drop down menu]
Follow the following figure:
3 Installing new library in Arduino IDE
To include a feature in our coding we need to include that corresponding resource code. These resource codec are available in the form of header files. Such header files are Arduino.h, String.h, IRremote.h etc. Each header file along with allied .C files brings some special features to the working of the code. These are called libraries. If any library does not present in the Arduino IDE system, we need to install that library in to the Arduino library through Sketch>Include Library>Manage Libraries… menu.
//Arduino IDE Sketch
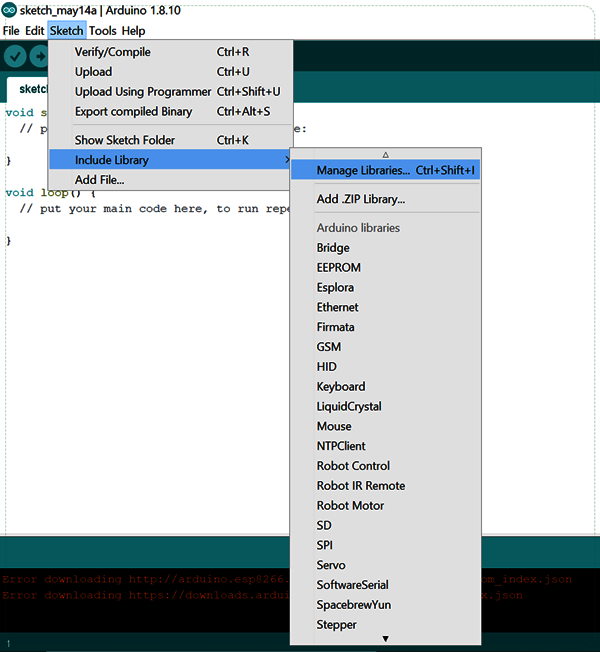 After clicking Manage Libraries.., a new window will open which will show the available downloadable libraries with Arduino IDE corresponding to the particular board which we have choosen earlier.
4 Powering Arduino
The core microcontroller used in Arduino boards Atmega 328 (now this one is used) can withstand not more than 5 volts.
So, there are different means an Arduino board can be powered on
An Arduino UNO board can be powered through its USB port with an USB cable. That USB cable must draw power from a Personal Computer or just from a USB power adapter.
An Arduino UNO can also be powered with a 12v DC power source. We can use a 12V DC power adapter easily available in the market.
We can power it with a 12V DC Battery also.
It can draw power through its raw pin from a DC power source more that 7 volts upto 16 volts
5 Saving, Compiling, Uploading the .ino file
Once program code is written and compiled successfully, we need to upload the .ino file along with the allied files to the Arduino board.
Clicking the Compile Button, the .ino file is compiled.
If no error was there, and right board is selected in Tools>Boards menu, we need to set the right port.
Once the Arduino board is connected to the Computer with the USB cable, the Tools>Port menu becomes enabled. And the right port no will be shown in Tools>Port submenu.
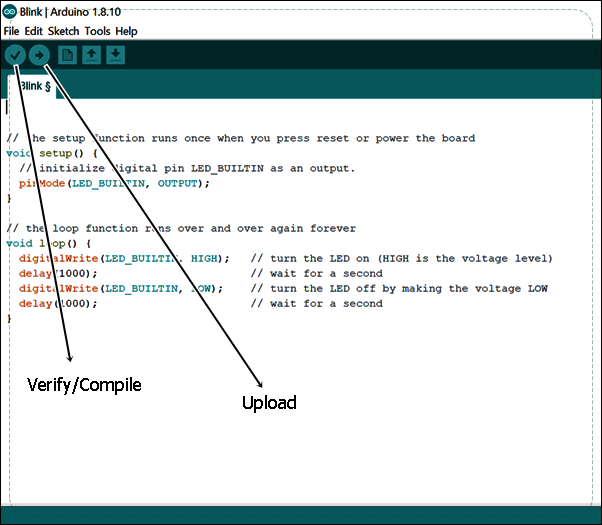
Now, the right board is selected, right port is chosen. Now to upload the .ino file to the Arduino board click Upload Button.
In below figure the indicated buttons are Verify/Compile button and Upload Button.
After successful compilation, the code will be uploaded to the board once the Upload button is pressed.
//Arduino IDE Upload Verify
 6 Serial Monitor
After uploading the code to the Arduino board, we need to check how the board is performing.
We can check whether the loop is running properly using this serial Monitor.
We also can check any run time error that may occur through this Serial Monitor.
Serial Monitor is avail in Arduino IDE at Tools>Serial Monitor.

